Showing posts with label Recipe. Show all posts

Tuesday, 12 November 2013

Marble Cake: Strawberry, Vanilla and Mint

Last week I made a cake for a friends birthday. I wanted some colour but I couldn't be bothered doing a layer cake (too much time!). So instead I decided to do a marble cake, because you can have all the colours and flavours and you just put the mixture in one pan- easy!

I took a basic vanilla cake recipe and made a big batch of that. Then I split it into 3 bowls. To the first bowl I added some more vanilla. To the next I added a little spearmint flavouring and green food colouring. To the third I added some strawberry puree (about 10 strawberries pureed) and a little pink food colouring. You could just use strawberry flavouring, but why not use the real stuff if you have it?

Then I added 'splotches' of each flavour to the pan. Once all the mixture was added in I swirled it with a toothpick.


Bake as usual, then let it cool. Decorate as you wish- there are so many ways! I decided to do rosettes in the three colours, but you could just do plain rosettes or frosting and let the inside be a pleasant surprise!

I found that the flavours went together well. But there are so many other options depending on what you have in your cupboard- chocolate, orange and vanilla? chocolate, lemon and strawberry? Chocolate, mint and orange? So many options, my mouth is watering already.....

Saturday, 15 December 2012

Castle Cake Tutorial

My niece turned 5 last weekend, and I was asked to make a castle cake for her princess themes birthday party. I modelled the cake off the classic Women's weekly castle cake:


I wanted to step it up a notch, so I googled for cake ideas. Many were too hard for me, but I took a lot of ideas from a lot of different cakes, and designed my own. I found drawing a sketch helped my planning too.

Fondant

I used pettiance icing, which is the same as fondant. I started by colouring about 1.5kgs of it pink and about 250g green (leaving 250g white). The reason you want to do the whole lot of one colour at the same time is so you don't end up with different shades of that colour throughout the whole cake (you will never match the shade perfectly again.) When you have coloured your fondant (tutorial here if you don't know how to do that) make sure you wrap it well in glad wrap/plastic wrap as it dries very quickly.


Turrets

You can do the turrets a few days in advance, as there is no cake in them, so they won't go off. You will need

- your coloured icing
- 5 toilet rolls
-plastic wrap
-5 small waffle or ice cream cones.
-a knife
-a rolling pin
-icing sugar
-water and a small brush
-tooth picks

Start by covering the toilet rolls in plastic wrap (for hygiene reasons). Then roll out the icing colour on a bench which is well dusted with icing sugar (so it doesn't stick to the bench.) Wrap a toilet roll in the fondant and cut off to shape. Use water on a brush to wet one edge of the fondant, so the other side will stick to it. Use your fingers to shape it. (remember to put un used fondant straight back in the plastic wrap.) Use the back of a knife to lightly draw a brick shape on the fondant before it sets. Repeat this for each toilet roll.

For the cones, use a different colour. As before, roll the fondant out. Brush the cone with water and roll the fondant on and cut it to shape. Use your fingers to stick it to the cone. Repeat for each cone.

Use a little water to stick each cone to a covered toilet roll. I used some white icing in the turret shape (as above) to help stick them together, and to hide the gap. Roll out some white icing, cut into shape, and wrap around the join from the toilet roll and the cone.

If you want flags for the top of each turret, cut these out from the white icing. Stick half a tooth pick as the post in each flag. Leave for 24 hours to set, then place carefully in the top of each cone.

The cake

You will need to bake 2 big square cakes (any flavour). And one loaf tin sized cake. Leave until completely cool.

Level the two big cakes and fill and cover with butter cream frosting. This is your cake base. Now you will need to roll out your big lot of coloured icing. Remember to use a bench with icing sugar on, and turn over the fondant frequently. You will want it to be about 80mm thick. When it's big enough, cover the square cake with it. See a tutorial here for how to cover a square cake with fondant.


Assembly

When the cake is covered, you will want to put the turrets on straight away, so they will harden and stick as the fondant hardens. Put one turret in each corner. You may need to use toothpicks to help them stick.

When the turrents are there, you can see how much room there is for the middle cake. Cut the loaf tin cake to size, and cover with icing, then fondant (as above.) Stick this to the middle of the cake with a little frosting on the bottom. When this cake is in place, place the final turret on top.


Decorations

This is the fun part where you can be creative. Make windows and doors out of fondant. Stick them on using a little water. Make a mini princess, make whatever you feel like. Its the perfect time to use any extra fondant up, and add your own flair. I also added a paper banner with my nieces name on it.


Watch them be amazed, and enjoy


Monday, 29 October 2012

Peach and Blueberry Smoothie


I've been on a little bit of a health kick recently and have rediscovered smoothies.

I had a great smoothie recipe book collecting dust, but when I opened it again I couldn't believe I had ignored it for so long. Smoothies are so good cos they are tasty and often a full meal, while so packed with good things.

I'm going to share some of my favourite smoothie recipes soon on this blog (including a chocolate thickshake-esque one, chock packed with spinach of all things.)

Meanwhile, enjoy this recipe for a peach and blueberry smoothie (recipe by me, inspired by all other smoothie recipes.)


You will need:
- I can of sliced peaches in juice
-1 cup frozen or fresh blueberries (or other berries)
-A good dollop (About 1/3 a cup) of plain unsweetened yoghurt

Add all the above to your blender (including the juice from the peaches), and blend. If you're not using frozen berries, you might want to add some ice to make it a cooler drink.

Enjoy! x

Friday, 22 June 2012

Recipe: Lolly Cake

Here in New Zealand, Lolly Cake is a baking staple. And its so easy because there is no baking, or real baking ingredients involved.


All you need is:

-1 packet malt biscuits
-1/2 tin of condensed milk
- 125g of butter
-Eskimo lollies, or fruit puffs
-Coconut

First, you need to smash/blend the malt bikkies. Depending on your mood, you can smash them in a plastic bag, or blend them in a blender.

In a large bowl microwave on low the condensed milk and the butter.

Chop up the lollies to your desired size.

Mix all ingredients together


Coat a surface in coconut, then, roll out the mixture into a log shape onto it.

Don't think about what it looks like
Coat it all with coconut


And wrap it in cling wrap and put it into the fridge for a few hours (or the freezer for 20).

The cut it into your desired shapes


The recipe is from here, and the site also has a few tips about other things you can add to the recipe.

This is great to bring to any dessert evening, or to pop into lunches.

Enjoy! xo

Thursday, 17 May 2012

My top 5 Baking Recipes


1). Chocolate Cake
This is a very dense and almost mud cake, which is so delicious. It has a cup of plain yoghurt in, which I think is the key for excellent moist-ness


Lemon and Strawberry - yes please! The cupcake is lemon flavour and the icing/frosting is strawberry, but you could use any fresh berry you had on you.


A nice twist on the old rainbow cake, but as only one layer actually has food colouring (the others are plain and cocoa), its not too fiddly to make. And you can make the icing/frosting as complex or as simple as you want


This wouldn't be a Kiwi blog without reference to these bikkies. So easy to make, and delicious too. 


Another fun cupcake, relatively simple in taste, but its fun to work with the contrasting cocoa and vanilla flavours


Friday, 2 March 2012

Recipe: Crispy Honey Chicken

This recipe is basically a stir fry (quick and easy) with the added deliciousness of cripsy honey chicken. I got the recipe from here

It is SO delicious. Promise me you'll make it

Ingredients (for 2):

200-250g chicken, sliced
1 egg white
1/4 cup cornflour (add more as needed)
1/4 cup honey
1 tbsp soy sauce
Veges of your choice but I recommend:
Bok Choy
Mushrooms
Garlic
Capsicum


Chop veges the way you want them. Put the egg white and the cornflour in their own bowls.
Heat a fryingpan with olive oil and cook the veges. When they are softened add garlic, soy sauce and salt and pepper to taste. Cook for about another minute, then put them aside in a bowl.

You will use the same frying pan for the chicken. Drench each chicken piece in egg white, then cornflour, then cook in the frying pan


Stir regularly until the pieces are cooked. When cooked add the veges back in. Add honey and mix to combine, add more salt and pepper or soy sauce if needed.


Serve with rice or noodles. Enjoy! (You will).


Wednesday, 22 February 2012

Recipe: Basil and Almond Pesto and Fettuccine

Matt and I got a new pasta machine around christmas, and have used it quite a bit to make fresh pasta. Fresh pasta is SO good. However I am not going to give you the recipe for it, because its Matt that always makes it, I just eat it. If you are keen, google a recipe.

The pasta making process:


For this recipe, you could make your own fettuccine, or buy fresh stuff, or dried.

Almond Basil Pesto
-1 1/2 cups almonds, chopped and lightly toasted
-2 cups packed basil (2 small basil plants from the supermarket.) Add some spinach as a substitute if needed
-2 garlic cloves, peeled
- 2 tablespoons lemon juice
-lemon zest from 1 lemon
-3/4 cup olive oil
-dollop sour cream (my addition to make it more creamy.)


Grind the almonds to meal in a food processor. Add basil, garlic, lemon juice and zest and blend. Slowly add olive oil. Add more olive oil or sour cream if wanted for a better consistancy. You could also add parmesan.

Will keep for a while in the fridge, you can use it on sandwiches, as a dip, or in a pasta dish

Basil and Almond Pesto and Fettuccine 
(created by me and Matt)

-Enough fettuccine for 2
- a serve of the above pesto recipe
200g bacon, chopped and cooked (optional.)
-veges of your choice, but mushrooms, broccoli and courgette are good. Chop and fry lightly in olive oil till cooked.


When the pasta is cooked, drain, add the pesto and stir in. Add the bacon and veges and stir in.


Serve with parmesan on top


Thursday, 2 February 2012

Recipe: Marinated Chicken Drumsticks w Barley Roast Vege Salad

I used to only know 'winter' recipes - stews, casseroles, hearty soups, curries and so on. I soon had to learn to cook lighter summer meals, and with the help of the internet, some good recipe books and time, I feel like I am getting there.

The other night I felt like having chicken drumsticks, so I googled a marinade recipe. I also googled a salad recipe, because I had some barley I wanted to use. So, you see, I often end up googling different dinners. I mostly use recipes that have a high rating, or are from a reputable food website, and they have all turned out good so far.


You could serve the chicken with roast veges, or mash, or another salad. You could do the barley salad with brown rice or cous cous and with nearly any vegetable. You could add more veges or meat to the salad and make it a main.

Marinated Chicken Drumsticks
(Serves 2)

-4 x chicken drumsticks
-1 tbsp soy sauce
-1/2 tbsp honey
-1/2 tbsp olive oil
-1/2 tbsp wholegrain mustard
-1/2 tbsp tomato puree (I used tomato sauce and it was fine.)


Mix together the soy sauce, honey, olive oil, mustard and tomato puree. Cut 3 slashes in each drumstick, and pour over marinade. Use a cooking brush to get it all over the chicken. Leave in the fridge for 30 mins. (You don't have to.) Cook at 180 degrees for 30-35 minutes, until the juices run clear.


Barley Roast Vege Salad
(Serves 4 as a side, 2 as a main.)

1 Cup pearl barley
3 cups of water/vegetable stock to cook
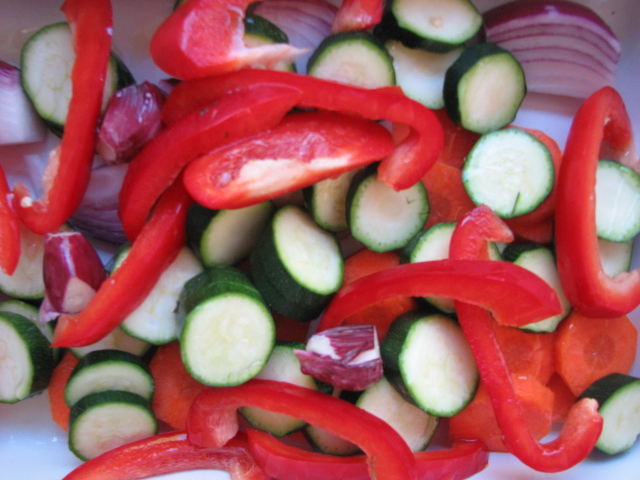
1 small capsicum cut into thin wedges
1 carrot chopped into thick rounds
1-2 courgette cut into rounds
3-4 garlic cloves, ends chopped off (not peeled.)
1 red onion, chopped
100g baby spinach chopped
small handful basil chopped
1/2 packet feta roughly chopped
lemon juice
Place all the veges apart from the spinach in a roasting dish, cover generously in olive oil and roast in the over for about 30-40 mintues, until cooked.
Place the barley and water/stock in a pot and boil, then simmer for around 45 minutes.

When the veges are cooked, peel the garlic and either put it in a food processor or use a pestle and mortar. Add more olive oil and lemon juice to make a dressing.

Mix the barley, veges, spinach, basil, feta and dressing in a serving bowl.
Enjoy in the sun with a big glass of wine and the one you love.


Thursday, 26 January 2012

Chocolate Cake with Mint Choc-chip Icing (Dairy Free + Normal Recipe)

When I saw this cake, I knew I had to make it. Mint and chocolate are perfect companions, and this cake looked devine.


I actually made it twice in two days. Once as a trial run - a one layered dairy version for a family dinner. And then for a friends kitchen tea party, as a double layered dairy free version.


Both were delish, in my opinion.


The recipe for the dairy cake was a yoghurt chocolate cake. I recommend using yoghurt in your baking when possible as it makes the baking so moist and delicious.
For this cake, I used the icing as stated in the original link, but I made only 1/3 of it, as I was icing a small cake. 


For a trial run, it was a hit, and was devoured by my in laws.


For the kitchen tea party though, I knew I had to step it up a notch.


Dairy Free Chocolate cake with mint chocolate chip icing


Sorry for the photo quality... my camera died.


Heat the oven to 180C

Grease 2 20cm baking tins (or if you only have one, bake one at a time.)

To do a double layer cake you will need to double the below recipe.

In a medium bowl, sift together: 

250g (1 1/2 cups) plain flour 
4 tbsp cocoa powder 
250g (1 cup) caster sugar 
1 tsp baking powder 
1 tsp baking soda 
1/2 tsp salt 

In a separate bowl, mix together: 

5 tbsp (1/3 cup) of vegetable oil or apple puree 
1 tbsp vinegar
1 tsp vanilla essence 
250ml (1 cup) warm water. 

Slowly mix the liquid into the dry ingredients until just mixed, do not over mix. It is important you do not just dump the liquid into the dry ingredients (like I did) because you will end up with lumps of flour. Pour it in slowly and mix as you go.

Pour into the prepared tins and bake for 25-30 minutes.

Take from the oven and let them cool.

For a double layer cake you will need to make the bottom layer flat, so you will need to cut off the domed top. I would recommend getting a long piece of dental floss and pulling it slowly through to pull off the top, to make a flat surface.

Icing

For the icing, I used the same recipe as for the dairy version, but with dairy-free margarine as a butter substitute (I could not tell the difference taste wise.)

280g dairy free margarine
500g icing sugar (about 4 cups), sifted
2-3 tsp peppermint essence, adjust to taste
150g dark chocolate, very finely chopped or pulsed through a food processor
green food colouring (about 6 drops)

(This makes a lot of mixture. You might want to start with less and work your way up, lest you end up with left over mixture like me.)

Prepare the mint icing; Place margarine in a large mixing bowl. Beat with an electric mixer on high until fluffy and smooth. Add sifted icing sugar one cup at a time, beating until combined. Add peppermint essence to taste and green food colouring. Gradually add chocolate chip pieces until you have a good distribution of chocolate bits.

First ice the top of the bottom layer cake - this will be your 'filling.' Then place the top cake on. Ice the whole cake (do not heat your icing spatula or the chocolate will melt, making the icing brown in colour.)

If you have left over icing, wait for it to harden (put it in the fridge), then make 'ice cream scoops' to put on top. Put small waffle cones on to make it look like cones.

Yes, a lot of people thought this was an icecream cake.

Enjoy! xo


Tuesday, 24 January 2012

Summer Vegetable Tart

This dish is so summery and light, its perfect for eating outside on a still evening. You can make this as one big tart or a few medium size tarts, or (as I did for New Years) make about 24 mini ones in muffin tins.

This recipe is from Foodtown magazine, which I personally think is the best(/most realistic to make) food magazine out there at the moment. Yes, I feel a bit ashamed at liking a supermarkets own magazine, but its good (Matt and I are using a lot of recipes from it), so I have overcome the shame.

Summer Vegetable Tart

Ingredients:

1/4 cup olive oil
1 Cup diced red/yellow capsicum
1 courgette, diced
1 small eggplant, diced
1/2 red onion, diced
1 teaspoon vegetable stock

2 eggs
1 cup cream
1/2 cup parmesan or normal cheese and parmesan or normal cheese for sprinkling
freshly ground pepper and salt.

Pastry:
Buy shortcrust pastry, or make your own. (I have done both for this recipe. Homemade is better!)
Use any shortcrust pastry recipe, or the one below:

1 Cup flour
Pinch of salt
90g cold butter, cubed
1 egg yolk
1 1/2 tspn ice cold water

Looks SO healthy. Don't worry we'll be adding cheese and cream soon


Directions


Pastry:
Pop all the ingredients (except water) into a food processor, and process until it becomes like a pastry. Add the water and more butter if necessary. Slightly kneed the mixture, then let it rest for 30 mins in the refrigerator in glad wrap.

On a slightly floured surface, roll out flat to make the size you need. Cut the shapes out if you are doing the muffin sized version, or roll out smaller balls for the medium sized version.

Put in tin/s and brush with water. For the large or medium size ones you will need to blind bake, so brush with water or egg yolk, and bake at 180 for about 15-20 mins.


Tart filling:
Heat the oil in a large frying pan, add the diced veges and the stock powder. Saute for about 5-10 mins.
Fill the tart/s with the mixture. In another bowl whisk the eggs and cream together, add parmesan/cheese and season to taste. Pour over the tart/s. Sprinkle extra cheese on top and cook at 180 for about 15-20 minutes

We ate it with homemade garlic bread. (I'm gonna save that recipe for another time. You could just google a recipe for it. You really should google a recipe and make it right now, cos garlic bread is SO good.)


Enjoy! X

Friday, 20 January 2012

Easy Cake Decoration

You guys probably know I am into baking, and I like making cakes, but my decoration skills are not that hot. Not hot at all. But because I know some easy tricks, I seem to have fooled people into thinking I am a baker extraordianaire!

Here are some easy ways to decorate a cake

Image Credit
All you need to do is a regular icing, then get cookie cutters of different sizes and gently place them on the icing. Through the cookie cutters sprinkle hundreds and thousands or chocolate or nuts - anything you like. Contrasting colours will look better.


Image Credit
Drizzle icing is perfect for lemon cake. Just make the icing (which is usually lemon juice with a bit of icing sugar) and drizzle on when the cake has cooled


For this one you will need an icing bag with star tips, you will need to do a thin base layer first of normal icing. Then fill your icing bag and swirl the icing with a star tip to get this effect. The icing will need to be really hard (lots of icing sugar) for this to work. You could choose to do an ombre effect (different shades) or just one colour.


Image Credit
Ok, this cake picture couldn't describe what I imagined in my mind. I wanted a chocolate cake covered with malteasers as decoration. Forget the weird things on the top and the double layer, for a simple chocolate cake, you could do a thin icing and stick heaps of malteasers to it. Yum!


Image Credit
This one is so easy. Just do your normal icing and stick some chopped nuts (walnuts here) on the side (or maybe on the top instead.)

Image Credit
For this, you will need a thin base of icing first. Stick the kit kats to the side, tie with a ribbon if needed/wanted. And cover the top with pebbles. (Then eat left over icing, kit kats and pebbles.) Easy!

Image Credit
A normal icing with some sprinkles placed around the edge. To get it right you might want to cut out some baking paper in a circle for the middle and gently place it on the iced cake. Then shake the sprinkles on and then take the baking paper off.


This icing is supposed to look like ice cream (just add chopped chocolate to your mix, and green food colouring and mint essence if you want it to look like this.) You can use balls of icing and cones to make an ice cream 'display' on top.


I don't really need to describe this one, just do as the pic shows!


You can use buttercream (or use dairy free margarine) or cream cheese icings for any of these, except the drizzle icing.

There you go, so many easy ways to make a cake look great. I have tried hardly any of them (hence why they are all internet photos), but I will be soon... which one should I start with....?


Related Posts Plugin for WordPress, Blogger...